
 Skip to content
Web test automation is essential for ensuring quality in web application development. As technology advances, tools such as Robot Framework and StackSpot AI have stood out due to their ability to reduce cognitive load — whether through Robot’s intuitive syntax or StackSpot’s role as a contextual AI code assistant offering assertive suggestions.
In this article, we’ll learn how to use StackSpot AI and Robot Framework to automate web tests to validate accessibility.
We’ll also walk through the initial configuration on the machine and run the tests, demonstrating the practical value of these tools.
About StackSpot AI
StackSpot AI is a platform that helps development teams generate and optimize code, providing advanced suggestions and simplifying everyday coding tasks. This is because the AI code assistant can use your context, knowledge bases, and technological decisions to generate more assertive, high-quality suggestions.
StackSpot AI offers multiple benefits, including:
- Optimized Developer Experience (DevEx);
- More assertive code suggestions;
- Quick commands to automate repetitive tasks;
- Increased development productivity and reduced cognitive load;
- Error reduction;
- Support for code quality and security actions;
- Support for multiple programming languages;
- Integration with various development platforms, etc.
Best of all, StackSpot AI is free to use. Start using StackSpot today.
What is Robot Framework, and why do we use it?
Robot Framework is an open-source automation tool built on Python, widely utilized for automating tests across mobile, API, and web environments. Its syntax is easy to interpret, relying on keywords and various libraries.
We selected Robot Framework for its user-friendly interface and support for the Selenium Library, which is essential for web test automation. Seamless integration with tools such as Visual Studio Code and the StackSpot AI plugin was also a major factor in our decision.
Importance of accessibility in web pages
Accessibility on the web is essential for ensuring that everyone, including individuals with disabilities, can use the internet effectively. Making a website accessible goes beyond creating beautiful and attractive design; it ensures that the content or services are understood by everyone independently. This action improves the User Experience (UX) and broadens the site’s reach to a more diverse audience.
The importance of the title element for digital accessibility
The “title” element is essential for accessibility, especially for visually impaired people who use screen readers. The page’s title is one of the first pieces of information announced by the screen reader, helping them understand the context and purpose of the page quickly. In addition, the title appears in the browser tabs, making it easier to navigate between multiple open tabs.
Web test automation with Robot Framework and StackSpot AI
Now that you’re familiar with the tools we’ll be using, it’s time to start working with Robot Framework and StackSpot AI to automate web tests and check the accessibility of elements on web pages. Next, we’ll move to the practical part!
Configuration
Before you start, you need to set up your development environment. Make sure Python is installed on your machine. Then install the robot framework library using pip:
pip install robotframework
Install the SeleniumLibrary to interact with web browsers, and run the command:
pip install robotframework-seleniumlibrary
For Selenium to work correctly, you must install a browser driver. In this article, we’ll use ChromeDriver, which allows you to control the Google Chrome browser. Download the driver and follow the installation instructions according to your operating system.
Install the StackSpot AI plugin for Visual Studio Code or JetBrains. Follow the step-by-step instructions in the documentation. For a detailed visual walkthrough, watch the installation video.
Now, we’re ready to start mapping the elements for our automated test.
Mapping the StackSpot site element
In this article, we will map the “title” element and validate its presence on the page. These are the steps:
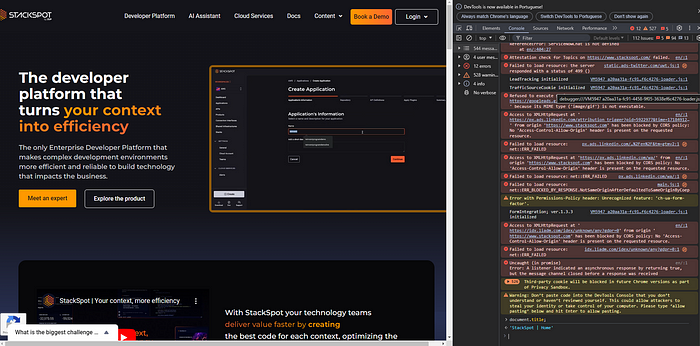
- Access the site: Open the Chrome browser and navigate.
- Open the developer tools: Press Ctrl + Shift + I on Windows/Linux or Cmd + Option + I on Mac to open the Chrome Developer Tools. Alternatively, right-click anywhere on the page and select “Inspect“.
- Navigate to the console: In Developer Tools, click on the “Console” tab. This tab allows you to run JavaScript directly on the loaded page.
- Run the command: Type the following command into the console: document.title
- Check the result: The console will return the page’s title, which is the content of the <title> tag in the HTML. The result will be: StackSpot – StackSpot | Home
Creating a prompt for web automation
Now, let’s create a prompt to validate the page title of the StackSpot homepage. Follow the steps below:
- Create a test file: In Visual Studio Code, create a new file with the extension .robot, for example, test_stackspot_homepage.robot.
- Create the driver folder: Create a new folder called driver in your project directory. You can do this manually or using the terminal. To create the folder via the terminal, run the command at the root of your project: mkdir driver
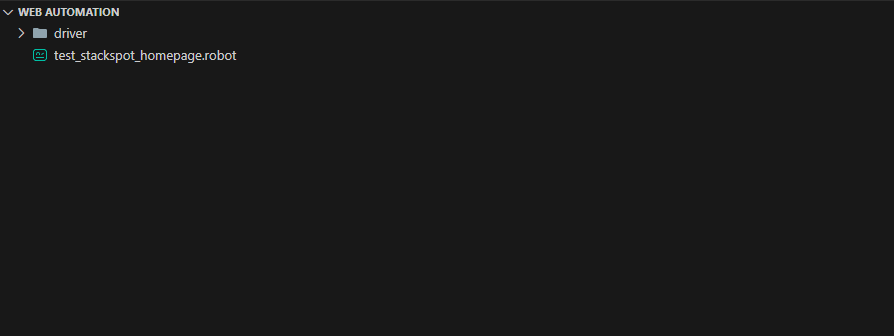
After creating the driver folder, move the “chromedriver” file downloaded in the previous step into this folder. You can do this manually by dragging the file into the “driver” folder or using the terminal. To move the file via the terminal, run the following command, replacing “<chromedriver_path>” with the path where the chromedriver was downloaded:
mv <caminho_do_chromedriver> driver/
Finally, check that chromedriver is in the “driver” folder. The structure of your project should look like this:

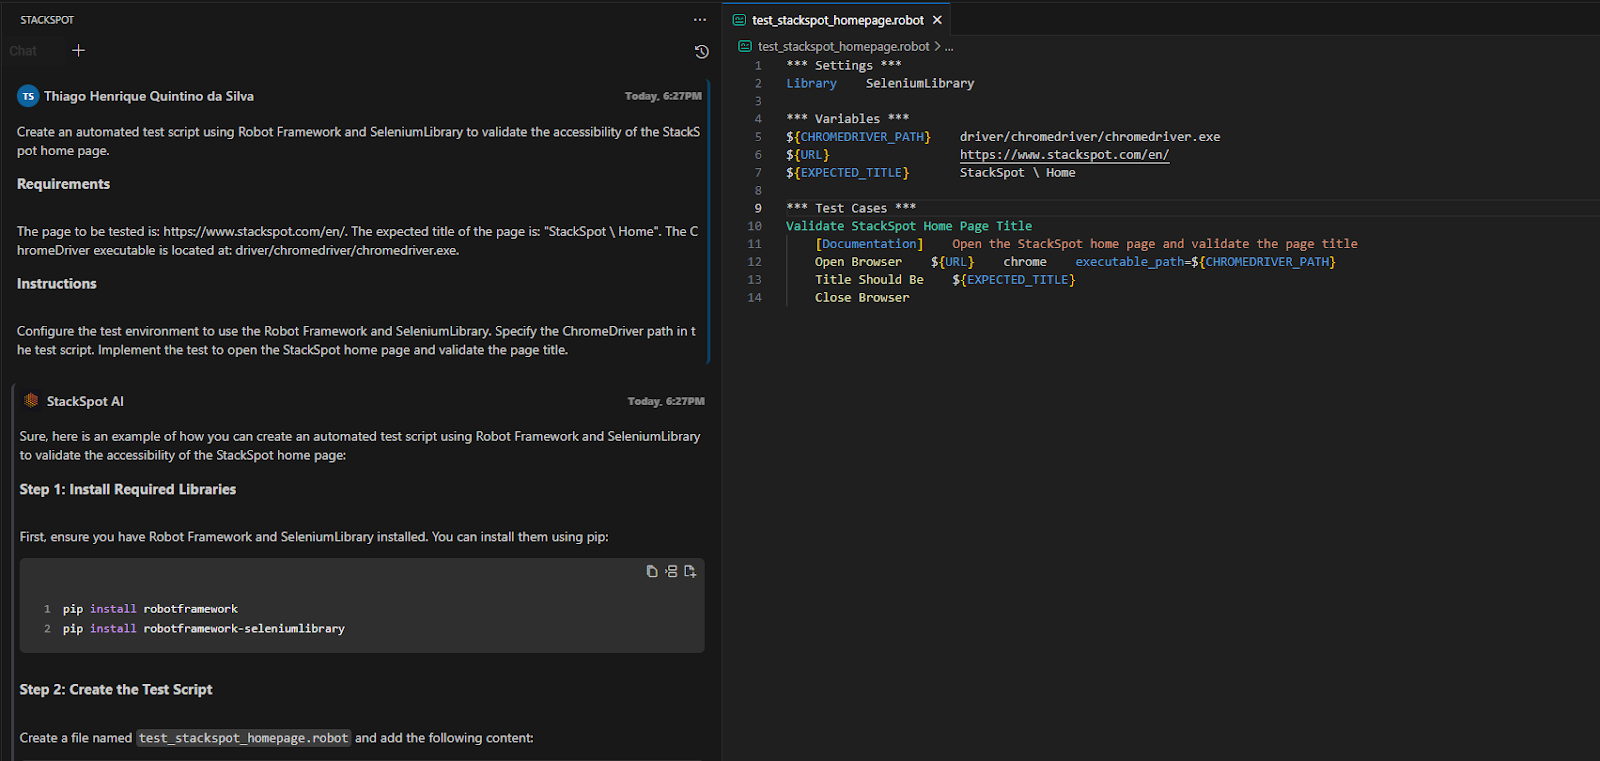
- Use the StackSpot AI Plugin: Type the following prompt and wait for the response from StackSpot AI:
Create an automated test script using Robot Framework and SeleniumLibrary to validate the accessibility of the StackSpot homepage.
### Requirements ###
- The page to be tested is: https://www.stackspot.com/en/.
- The expected title of the page is: “StackSpot | Home”.
- The ChromeDriver executable is located at: driver/chromedriver/chromedriver.exe.
### Instructions ###
- Configure the test environment to use the Robot Framework and SeleniumLibrary.
- Specify the ChromeDriver path in the test script.
- Implement the test to open the StackSpot homepage and validate the page title.
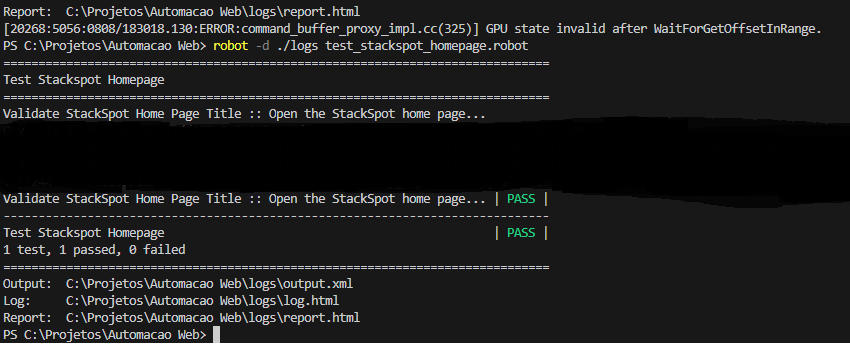
- Run the test: In the terminal, run the command below to start the test:
robot -d ./logs test_stackspot_homepage.robot
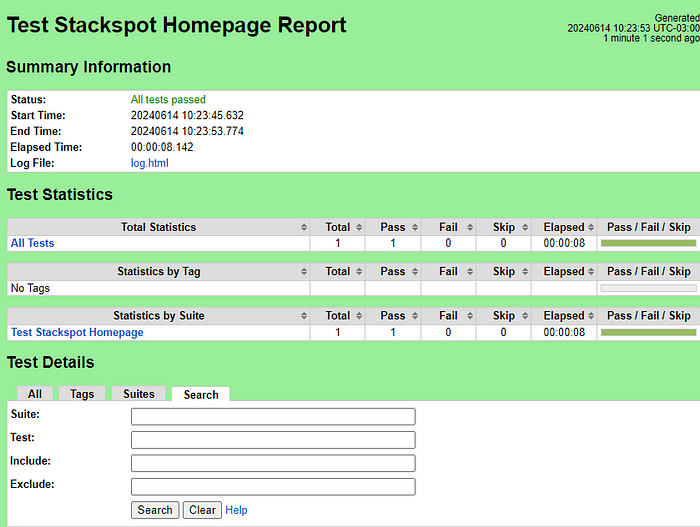
- Check the result: After execution, the automation framework generates a detailed report with the test results in the logs folder.
Prompt for running in headless mode
Headless mode allows the browser to run in the background without opening a graphical window. This is useful for Continuous Integration (CI) environments and saves system resources when running automated tests.
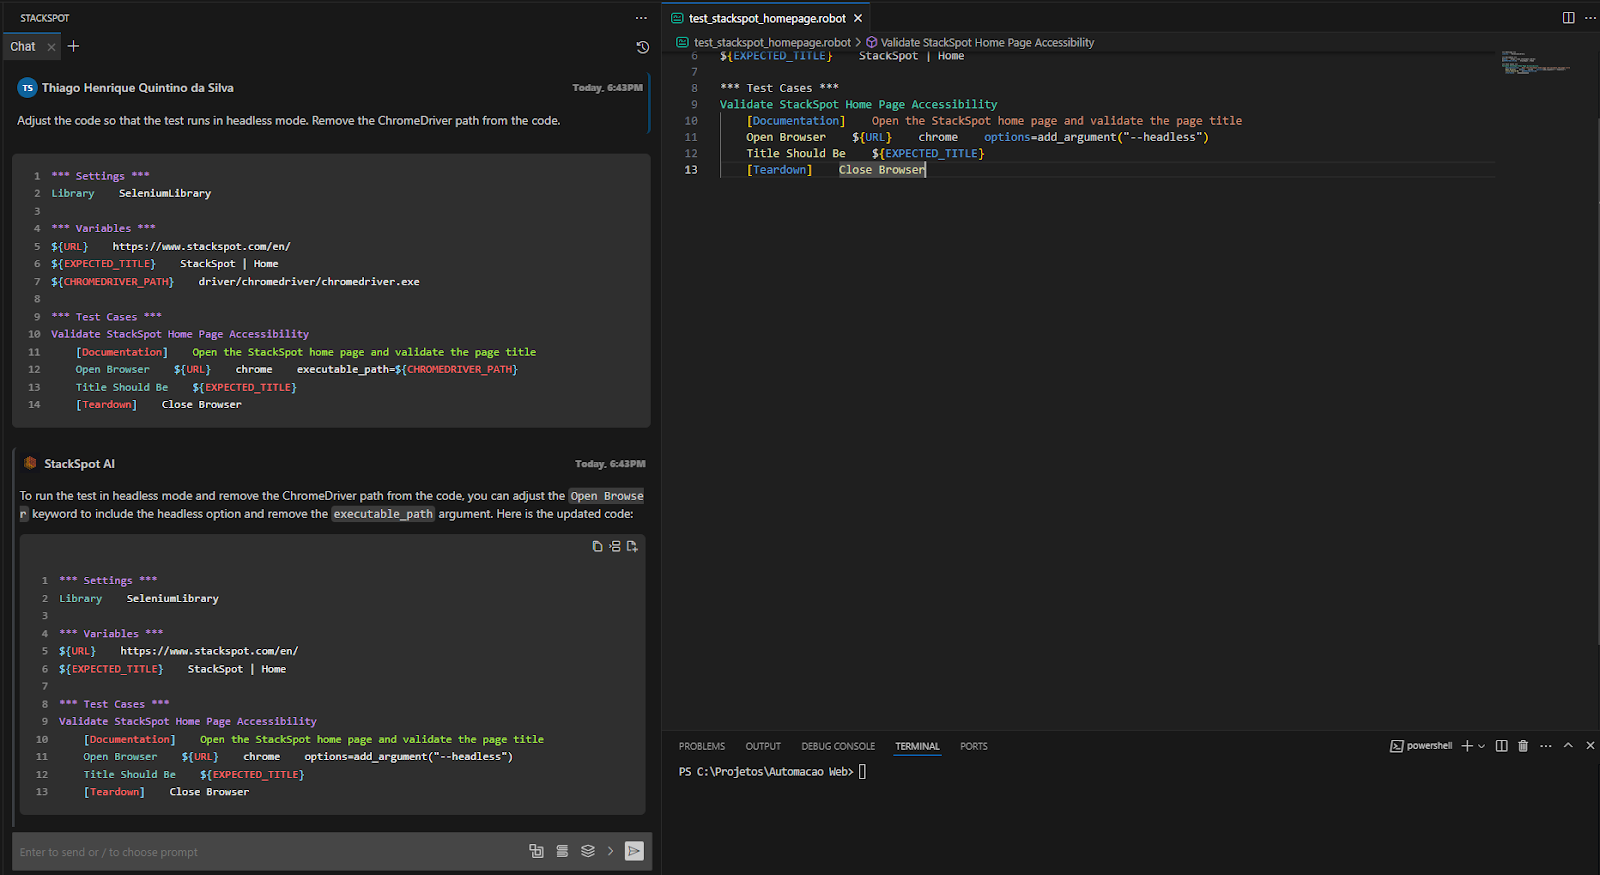
To adjust the script and add code snippets, we can use StackSpot AI to generate the necessary code. Select all the code in your IDE and write the following prompt:
Adjust the code so that the test runs in headless mode. Remove the ChromeDriver path from the code.
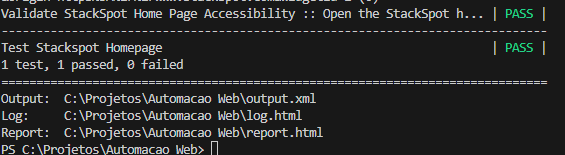
Run the test in the terminal and wait for the execution result.
StackSpot AI’s Quick Commands
Now that the code has been developed, we can explore another StackSpot feature: Quick Commands. These instructions allow predefined actions to be executed quickly and efficiently. Quick Commands make it easier and faster to interact with the system, allowing you to perform common tasks with less effort and time.
Generating project documentation
It is common programming practice to generate README for those who have access to the application’s source code so that they can maintain it more easily. Let’s put this into practice by creating a Quick Command to help us create this documentation. Follow the steps below:
- Follow the initial steps in the StackSpot documentation to create a Quick Command. In the IDE option, follow the instructions:
- Fill in the fields:
- Quick Command Name: generate-doc
- Command: generate-doc
- Description: Quick command created to generate documentation from the selected code
- Click on ‘Next’
- Select to create the quick command from a ‘Hello World’ template.
- In the section on using the Quick Command, follow the steps:
- Click on the checkbox labeled ‘explain code’
- Adjust the text of the prompt displayed to:
Since I’m a developer
When I select this {{selected_code}}
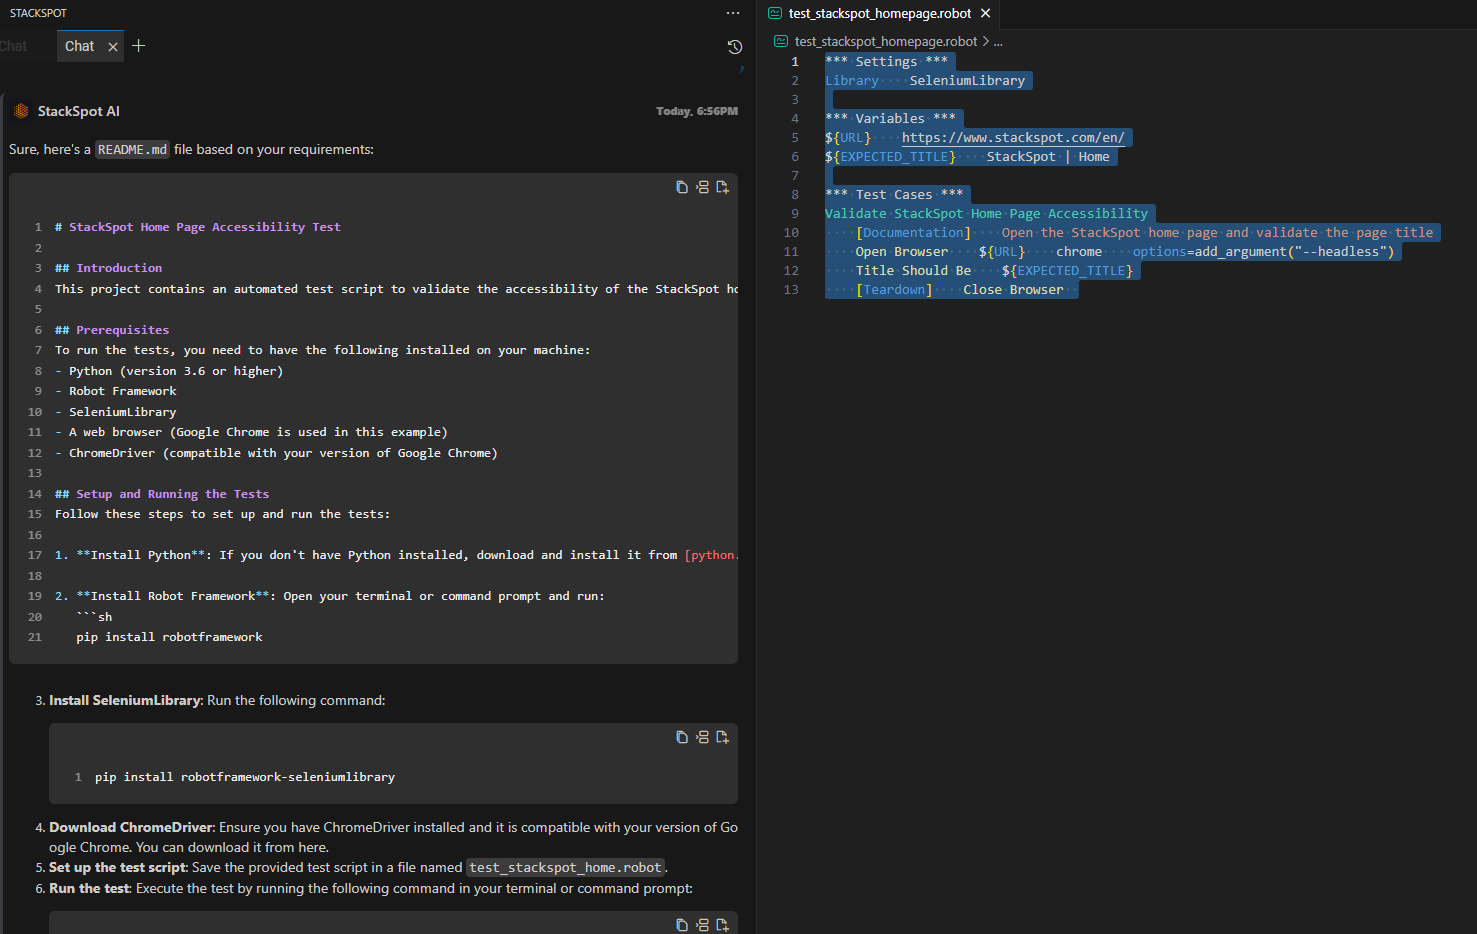
Then generate a README.md file
And the contents of the README should include:
– An introduction of the project
– Prerequisites needed to run the tests
– Instructions for setting up and running the tests
– Details of the selected code
– Summary of the expected output for each scenario
- Click on ‘Save’;
- Finish by clicking ‘Finish’.
Access Vs Code and follow:
- In VS Code, select the code snippet you want to format;
- With the code snippet selected, right-click;
- Choose StackSpot AI > My quick commands > generate-doc.
Watch the video tutorial on YouTube:
Conclusion
We have two powerful allies in test automation when we use the Robot Framework, with its simple syntax and easy understanding, alongside StackSpot AI. The ability to generate test scripts automatically and the ease of integration with Visual Studio Code make this combination an excellent choice.
Moreover, the Quick Commands feature enables agile execution of predefined actions, ensuring that the developer can focus on more complex and strategic tasks and reduce their cognitive load.
I hope this article has been useful and that it has helped you feel more confident about automating web tests with StackSpot AI.
Do you have any questions or suggestions? Please leave a comment.